Chick cake

Here is a how to guide to decorating your own cute spring chick cake.

The perfect cake for a little Easter gift or a family treat!

What you’ll need:

4 layers of a small cake (I use 5 inch round)

Buttercream (at least 250g butter, 500g icing sugar)

Food colouring paste or gel

Edible glue (not essential, can use a little water instead)

Simple set of sugarpaste tools

Piping bags

Piping tips – I used the following:

For daffodils 104 and 79

Cream flowers 18

Green flowers 191

Large yellow flowers 4b

Lilac flower Nifty nozzle 151

That’s a long list of nozzles but really all you need is 3! One large drop flower and a few smaller ones. These could be all star tips. You’d still make a cute chick cake with those.

Fondant

Black fondant or sprinkles for the eyes.

1. Start by making the feet using orange fondant. Roll 3 grape sized balls then flatten slightly and cut 2 small triangles out leaving the toe shapes.

2. Make a small orange fondant triangle for the beak.

3. To make a bow, roll out the fondant til 2mm thick. Cut a strip a few inches long. Fold each side over til they meet in the middle and stick with edible glue or a little water. Then squeeze the middle to form a bow shape. Use another small strip of fondant around the middle. Then cut two short lengths and cut a triangle out of them. Using edible glue attach the uncut ends under the bow.

4. Layer your cake leaving the top domed. If the cake isn’t domed then cut around the top edge so it is. Cover in a thin layer of buttercream (crumb coat).

5. Choose your colours and tips. Colour the buttercream and fill your bags. Start piping the largest tips first. Then fill the gaps using the flowers from the smaller tips.

6. If piping daffodils, do these last. Use the 104 for the petals and the 79 to make the centres.

7. Push the feet, beak and eyes into position. Add the bow on top.

Finished! A cute chick cake for your special occasion. Let me know how you get on, I love to hear about your cakes. Find me on instagram, Facebook and TikTok. @littlepeachcakery

Thank you!

Horse / Pony Cupcakes


To decorate these gorgeous horse cupcakes you will need:

6 chocolate cupcakes
Chocolate Buttercream
Small amount of vanilla buttercream
Sugarpaste
Brown food colouring
Tylose powder (to firm the sugarpaste – not essential)
Two round cutters or rose cutters
Edible glue
Piping bags
Star piping tip

1. Start by making the horses ears as the longer you let these dry the firmer they will be.  If you can leave them overnight that would be ideal.

Using the larger cutter cut 12 dark brown circles. Use the smaller cutter to cut 12 light brown circles. Stick the smaller circle onto the larger and carefully fold length ways. Pinch the top slightly and squeeze together the base of the ear.

Here is a video of how I use 2 rose cutters to easily create the ears.  For the horse ears I used brown and light brown sugarpaste with tylo to help firm them.

https://youtu.be/TjYRM0rDvR8


2. Make the horse’s eyes by rolling small equal sized balls of dark sugarpaste.

3. To make the mussle, use a small grape sized ball and slightly flatten to oval. Use a tool or end of a brush to make the nostril dents.


4.  Pipe the chocolate buttercream stars all over the cupcake.

5. Pipe the vanilla buttercream where you’d like the horses markings to be.

6. Gently push the ears into the buttercream.

7. Place the mussle on and the eyes.

8. Pipe a fringe in between the ears using the same star tip.

9. You can use a dap of edible white paint or edible glaze to give the eyes a light reflection.


And that’s the cupcakes finished.  I hope you found this tutorial helpful and happy baking to you.

You can follow my creations on Facebook and Instagram, just search @littlepeachcakery.

How to make a Flower Sheep Cake

A guide to make a little flower sheep cake in the same style as the Little Peach Cakery hedgehog cake. Ideal for birthdays and baby showers this little cake looks impressive and is straight forward to make.

You will need:

A tall 5 inch cake with domed top

Buttercream (250g butter with 500g icing sugar 1/2 tsp vanilla)

Small amount of white fondant and black fondant

A few tools including knife, rolling pin, ball tool, smoother

A small selection of piping tips, including a nifty nozzle /russian tip. Available from http://www.sugarandcrumbs.com

Piping bags

Food colouring

Pink edible dust

1. Cook a deep 5 inch cake or 2 shallow cakes. Allow to cool.

2. Divide the cake into even layers and fill with buttercream.

3. Crumb coat the cake with a layer of buttercream.

4. Roll out a small amount of fondant and cut an oval face.

5. Stick face to front of the cake. Use a ball tool to mark position of the eyes. Use one edge of a small circle cutter to make a nose shape. Use a knife to mark under the nose. Dust with a little edible pink.

6. Colour several bags of buttercream. Pipe flowers on cake starting with the nifty nozzles and swirls.

7. Pipe small drop flowers to fill all gaps.

8. Roll 4 small sausages for legs and mark the feet with a knife. Dust feet with a little edible pink. Roll two small black eyes.

9. Make small pear shapes for ears.

Finished! I hope you find this tutorial useful. I’m always happy to answer questions. You can find me @littlepeachcakery on Instagram and Facebook.

Make a Flower Sloth Cake

I took a few photos whilst making this cake. I didn’t know how it would turn out but I was pleased with the result. Like the flower hedgehog cake, it is a fairly simple cake to decorate and the result is impressive (photo’s do not do it justice!).

I baked a deep 5 inch round cake and layered with buttercream. I gave it a coat of buttercream after this.

I made the face and features of the Sloth from fondant with tylo added to keep it firmer. I made the claws from black florist paste mixed with white fondant.

The board is covered in white fondant and I used acrylic letters pressed in for the writing. I painted the letters with edible gold dust mixed with vodka.

I chose ‘this is me’ partly for the sloth which unusually is covered in flowers rather than fur and partly for myself. I realise one of the most enjoyable parts of cake decorating for me is being creative. Something that requires a little thinking time feels good for me.

Next all was needed is to attach the face and features using edible glue.

I piped using 3 flower tips and 1 leaf tip. I stuck to small piping tips to ensure sloth wasn’t ‘too hairy’.

I particularly enjoyed adding the leaves! A little bit like a real sloth with moss growing on them.

Last to add is the hands and feet (before the buttercream dries)

And there you have it. A cute floral sloth cake. Tasty too.

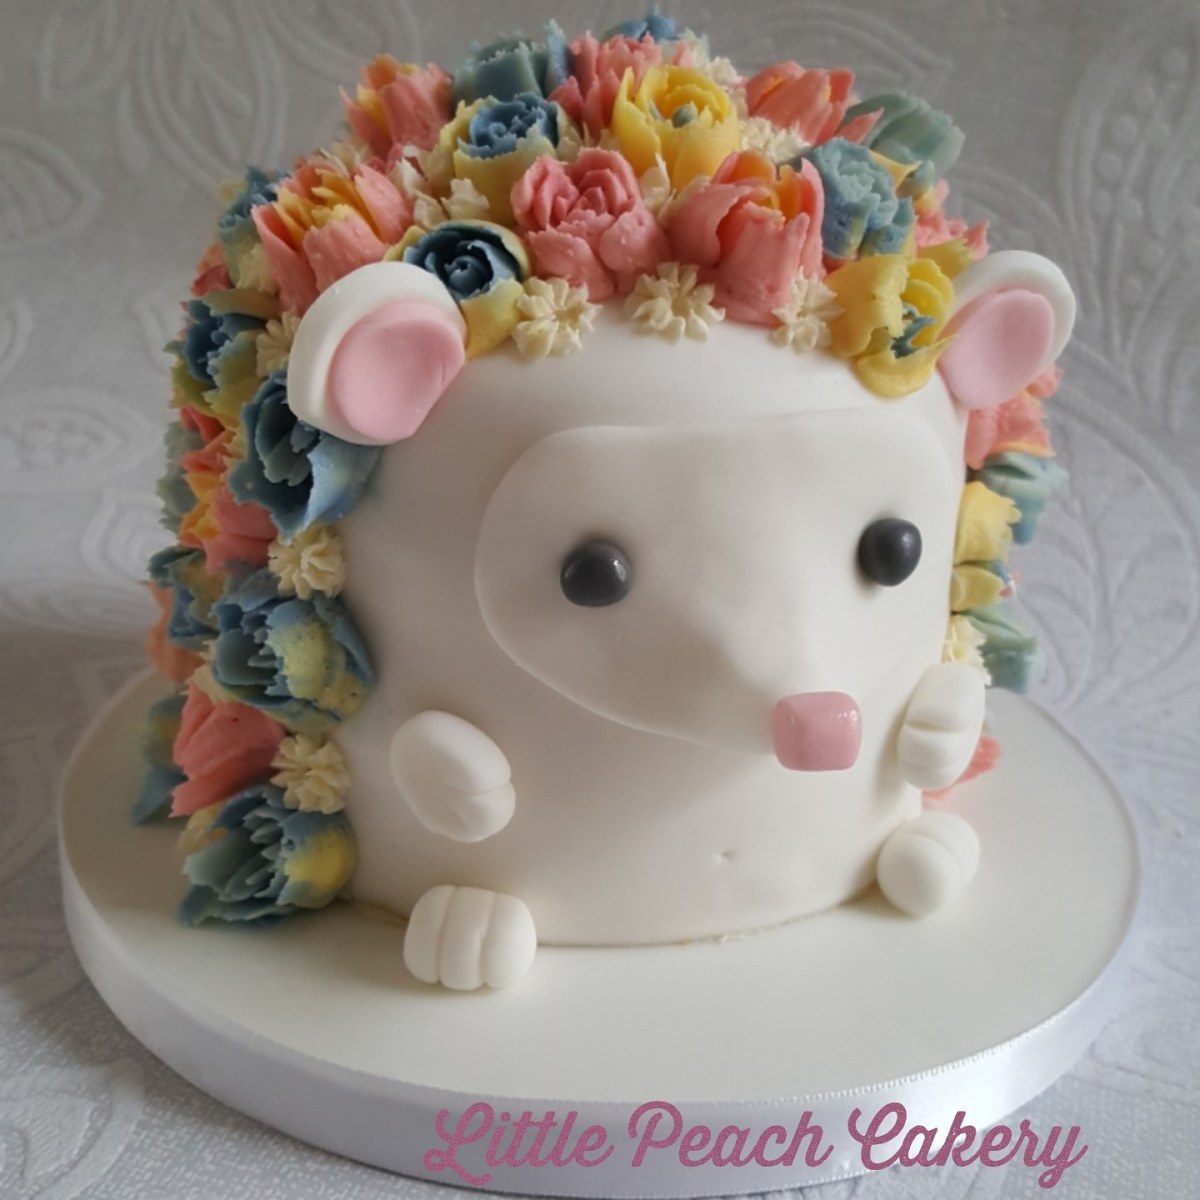
Hedgehog Cake Tutorial

Follow this step by step tutorial to create your own flower hedgehog cake

How to make a cute Hedgehog Cake with buttercream flowers as spikes.

This is an original cake design by Little Peach Cakery. I hope you enjoy creating your own little hedgehog cake.

You will need:

Sugarcraft tools – rolling pin, knife, cake smoother, ball tool, small rose petal or circle cutters.

A 5 inch round maderia cake, approx 5 inch tall and domed top.

8 inch cake board and ribbon

2 nifty nozzles, 2 drop flower tips

strong piping bags

Buttercream (1:2 butter and icing sugar)

Sugarpaste

Tylo powder or modelling paste

Food colour gel or paste

Edible glaze (optional)

Method:

1. Bake your cake, let it cool. Cut into 4 even layers.

2. To make the face of the hedgehog first add a little tylo to the sugarpaste to make modelling paste. Make a ball into a point and then with the point upwards squash the ball and use a small rolling pin to flatten the eye area. Cut the shape of the face out.

Make two pea sizes balls for the eyes. And a small square for the nose. I like to add a little edible food gloss to these.

The hands and feet are shaped and marked with a small knife.

I use two rose petal cutters for the ears. The larger using white modelling paste and smaller for cutting the pink modelling paste. I cut a few mm off the bottom of the ears where they will be glued onto the cake.

3. Add buttercream between the cake layers and add a thin coat of buttercream over the whole cake. Smoothing over the dome top. This can be natural dome or carved depending on how the cake has risen.

4. Roll out enough sugarpaste to cover half the cake. Smooth this over the front of the cake. Trim off any excess. Carefully transfer the cake onto a sugarpaste covered cake board.

5. Using edible glue attach the face and nose to the cake. You may want to use a cocktail stick to help hold in place.

6. Add the hands and feet using edible glue. Make a little hole as a belly button. Make 2 indents on the face and add the eyes.

7. Place the ears but do not attach yet. Make a note where they will sit and remove them for now.

8. Mix up several different colours of buttercream. You can add more than one colour to the piping bags to give different tones to the flowers. I like to make the smaller drop flowers white like daisies.

Tip: the buttercream needs to be firm but still able to pipe. Strong piping bags are needed. If the buttercream gets too warm whilst piping flowers pop it in the fridge for 5 mins and try again.

9. Start piping the nifty flowers onto the cake randomly. If you run out of buttercream try adding a different colour buttercream to the bag to give variety to the flowers.

10. Next add the drop flowers to any spaces between the larger flowers.

11. Glue the ears onto the cake.

12. Add a ribbon to the cake board.

And done! Of course you can use different nozzles to create the flowers. And use any colour combinations. I also use elderflower flavoured buttercream to add a more floral taste! I hope you enjoy creating your own cake. Thank you